
Patio Sealing 101: How to Properly Clean and Seal Your Patio
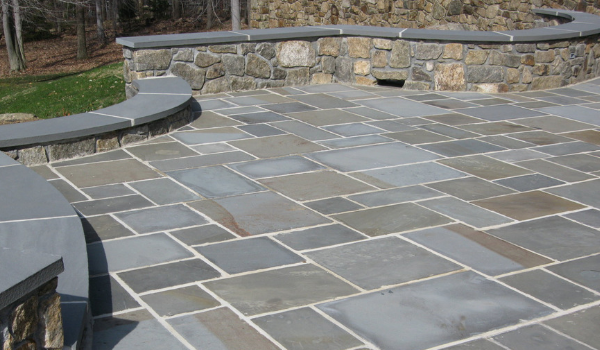
Patio sealing and cleaning are important tasks that help extend the life of your patio and keep your backyard a beautiful living space. Why is sealing stone patios and other types of patios so important? Many types of decorative stone are slightly porous, which means water and small pieces of debris can cause damage to your patio. This damage can include cracks, stains, and erosion. Patio sealing is an easy way to increase the longevity of your patio, whether you take on the task yourself or seek the professionals.
You should seal your patio within a year of installation and sometimes sooner, depending on the type of stone used. A professional can help you identify when it is best time to seal your patio for the first time. After the initial patio sealing, you should reseal your patio every two to three years. Typical maintenance between patio sealings can extend the life of the seal.
How does patio sealing work?
There are 5 steps to follow when sealing your patio to make sure you are doing it effectively. Having a friend or family member to help doesn’t hurt either!
1) Choose the Right Sealer
The type of sealer you will need depends on the type of decorative stone used in your patio. There are four main types of sealers: penetrating sealers, acrylics, polyurethanes, and epoxies. If you’re not sure which type of sealer is best for your patio, talk with a professional at Haynes to determine which is best to purchase.
2) Read the Instructions
While this step might seem like common sense, there are different ways to seal your patio. Equipment you will need could include a pump sprayer, a nap roller, or both. You want to make sure you have all the proper equipment before beginning your patio sealing project, so read the instructions all the way through.
3) Clean Your Patio
Once you have your sealer of choice and the right equipment, you need to clean your patio. Patio sealing is most effective if you start with a clean surface. Depending on the type of stone used, cleaning can mean sweeping or can include pressure washing. This also includes spot-scrubbing small stains. Otherwise, you’re sealing all the dirt, stains, and debris into your patio. This is also a great time to level any stones that may have settled unevenly.
4) Begin Applying Your Sealer
While you want to complete the patio sealing project in one day, you will be more successful if you complete a section at a time. This means working in a pattern to easily identify the areas that you’ve already completed. Create sections and begin sealing at the section farthest from your exit so that you don’t have to walk across your freshly sealed patio once you’re done. Maintain a consistent motion when applying sealer to spread it evenly across your patio.
5) Clean Up and Let It Dry
You’re almost done with your patio sealing project! All that’s left is cleaning your equipment and letting the sealer dry. When you followed Step Two and read the directions, there should be instructions on how to clean your equipment and if you need any special cleaners, like lacquer thinner. If you used a sprayer, you should spray water through the nozzle until the water runs clear. You should also wash your brush immediately before the sealer dries. While you’re cleaning your equipment, your patio will be drying.
Patio sealing not only extends the life of your patio, but it will also enhance the color of your decorative stone and will help to limit stains. Haynes offers top of the line patio sealers that work with many different patio types. While patio sealing can be a daunting task, with the right team behind you it doesn’t have to be. Interested in extending the life of your patio? Visit us or contact the Haynes team to discuss your options today!